What’s The Story, Muthur?
To the point, tabletop gaming

The Rusted Colossus 02: | How to make Art Assets Without Being An Artist
Alongside other life things, the Rusted Colossus has been ticking away steadily in the background, and the greatest advances forwards have been in making art assets for the adventure, so that’s gonna be the topic of today’s dev diary.

By JimmiWazEre
Opinionated Tabletop Gaming Person
Now then.
Alongside other life things, the Rusted Colossus has been ticking away steadily in the background, and the greatest advances forwards have been in making art assets for the adventure, so that’s gonna be the topic of today’s dev diary.
Before I begin though, If you have no idea what the Rusted Colossus is, I strongly suggest you start with this article and then come back to this. I’ll wait - it’s OK :)
Now I want to make it quite clear that I’m not an artist, nor do I have the kind of talent of GOZR’s creator - JV West. However GOZR’s art style is simple enough for me to be able to produce something that hopefully doesn’t look too out of place. Albeit with a process that takes time and research.
So, if it doesn’t sound too presumptuous of me, I thought I’d share my process today for creating art assets. Maybe it might be interesting and informative for some of you folks? And, who knows, maybe an actual artist will read this and be able to dish out some advice if I’m making any glaring errors.
Pencil and Paper, in front of the TV with the Dog
If you’re like me, then you can’t hold mental images in your head for longer than a couple of seconds before they start fading and blurring away like sand falling between your fingers. Maybe that’s normal, maybe it’s not? All I know is that it’s my normal, and we all work with what we’ve got.
To combat this, I like to start by looking at lots of pictures, particularly if its something really complicated. The titular Colossus for example, involved looking at lots of Gundam, Warhammer 40k, and Battletech art and miniatures - grabbing all the ones I liked and then keeping images of them to hand on my phone.
Then, typically sat in front of the TV with the family, I crack out my mechanical pencil and my recycled paper A5 notepad and I start free hand transferring those basic shapes to paper, tweaking and making my own changes as I go.
Drawing lightly, and using an eraser frequently, I’ll eventually come up with something pretty sketchy which works for me. At this stage, it’s just simplistic shapes and forms really.
I found an early image of my Sand Shark, and I’m hesitant to share it because at this stage in its lifecycle looks like such garbage - but transparency is king haha.

Accomplished artists would probably have something to say about technique here I suppose. Seriously, look at that thing! Do I seem like a guy that has anything valuable to say about techniques?
Black Lining and Juicey Details
This is my favourite step actually, I like to use a Tombrow double headed water based marker (purely as it’s the cheapest one I could find in the art shop that looked suitable). Using the fine head, I very steadily and deliberately start going over my lines. I’m not copying them exactly at this point, but rather taking the time to add texture, gribblies, and the little bumps and ridges that kick an illustration up a notch.
I enjoy this step so much because it’s really not difficult, and the difference it makes to the illustration is like night and day in terms of quality.
I also like to add the heaviest shadows at this stage too, assuming the ‘sun’ is in the top left usually. Normally because I’m digging the process by this point and getting a bit too carried away and ahead of myself, but any mistakes can be resolved later.

I also added some of the accompanying text here too, but more often than not, I like to draw separate elements of an illustration on a separate sheet.
Getting It on the Computer (The Digital Bit)
I have a combination printer/scanner which I use to import my illustrations on to my computer, and an old copy of Photoshop (before they went subscription) where I do my editing.
If you’re looking to follow my methods and you lack these things, you could use freeware like GIMP instead of Photoshop, although you’d have to do your own research on how it works. Likewise, instead of a scanner, you could take a photo of your art and then email it to yourself.
Using Photoshop, like a Noob
OK, I’m not a Photoshop guru by any stretch. I picked up a copy years ago, and I used it for the absolute basics. Typically, I end up learning how to do something cool with it, and then not needing it for months at a time and forgetting everything. The joys of getting old.
Some absolute basics that you need to understand before any of this will make sense are:
Brushes
Transparency
Opacity
Layers
Transformations
For this, I’m going to have to point you elsewhere, this free Photoshop course I just found might be worth a punt.
The subheadings below cover what I’m trying to achieve.
Restoring your scanned image to pure black and white
The first issue to resolve is that your need to clean up your images, and this is a lot easier to do if they start from pure black and white.
To do this, you need to use the Threshold tool, found under Adjustments. This opens up a little graph enabling you to select a position upon it where you’re happy with the balance between white and black. As you slide the threshold left and right, your image will change, so find a point where you’re happy.

One of the unwanted consequences of this tool is that all your line work will have lost it’s soft edges, and you’ll be left with nasty pixelated lines. Not to worry, we can fix this too.
With your Threshold layer selected, go to Filter > Noise > Median and set it to about 3. You can adjust this to taste, but the effect will be that your lines get a number of new pixels added around them, fading them into the background to make everything appear smoother.
If I’m happy, I’ll merge my layers at this point. so I’m just left with my black and white image which I’ll call the Lines layer.
Delete the White
I use the manual Lasso Tool to draw around my piece, then right click, Select Inverse, and delete. Then I use the Magic Wand Tool to select any white areas that remain and delete those too. It can help to hide your background layer, as this makes it easier to see where you have areas of white remaining.
The reason that I do this step is so that when I’m making selections or using the fill tool later on, I don’t get any weird surprises caused by hidden white bits.
Making tweaks
This is a great time to bring out the eraser and brushes tool to start making any tweaks to your work. I don’t bother with a tablet for this, just a mouse and a very steady hand does the trick for me.
For me, one of the key things to look for is that any lines that started close together and have since blurred into one, are once again defined separately.
Adding light values
I come from a miniatures painting background, so I have obtained a pretty good understanding of light values over the years, if you’re just starting out - this tutorial on light and dark looks good.
In Photoshop, I start of by creating a new layer underneath my Lines layer called Grey. Then I go back up to my Lines layer, and using the Magic Wand Tool, I select on the canvas, outside of the subject I’ve just drawn, and the right click and select inverse.
It’s important not to get rid of that selection as now I return to my Grey layer, and with a mid grey selected I use the paintbrush tool to fill everything inside of it.

I then create two more layers between Grey and Lines, called Light and Dark. Keeping that selection in place from earlier to prevent us from colouring outside the lines, and selecting an appropriately lighter or darker grey, I then use a suitably sized brush to add highlights and shadows to the piece.

This is all first pass stuff at this stage, and throughout the process I go back to these layers and add more light and shadows as seems appropriate.
Sometimes I even add a lighter grey highlight on a new layer. Just keep going until you’re happy with it.
Adding Colour
When adding colour, I sometimes like to create a layer per shade I use, but it’s not strictly necessary. The important thing is that for your colour layers, to set the layer opacity to around 50% - Not the brush opacity.
That way, with your colour layers above your grey layers, 50% of the shading beneath comes through as you paint the fresh layer.

The effect can be subtle, but it’s really important to do this as the way that the light volumes interact with the colours is what gives the image depth.
Importing Additional Elements, Moving and Resizing
Mimicking the hand written aesthetic of JV West, I tend to import these extra elements as separate layers. I don’t worry about the the light values steps, but I do take the opportunity here to select little elements and move them around with the transformation tool, including resizing and repositioning them.
If you compare the coloured Sand Shark image below with the one from earlier in the post - you’ll see that the text has been moved around and resized.
Adding Effects
I think the header text tends to look good when it has a coloured Stroke effect applied. You have to make sure that the element you want to effect is isolated on it’s own layer, and then select FX and Stroke. In the subsequent menu, I can affect the colour and width of the stroke to taste.
Ofcourse, you can also use FX to add drop shadows and other wizbangs if you like!
Here’s my current iteration of the Sand Shark. It’s probably ready to be used, but I make no promises that I won’t fiddle with it some more later!

Conclusion
Do you feel up to giving it a go? If you’ve got experience yourself - do you have any tips and advice for a noob like me? Have you got any art you want to show everyone on Bluesky by linking me in it?
Hey, thanks for reading - you’re good people. If you’ve enjoyed reading this, it’d be great if you could share it on your socials, and maybe think about subscribing to the Mailer of Many Things! Either way, catch you later.
This post contains affiliate links which, should you chose to use them and buy from them, allow me to keep this site running at no additional cost to you.


The Rusted Colossus: 01 | Concept, Structure, and WIP Cover Art
I’m deep in the guts of my latest project: The Rusted Colossus, a GOZR one-shot adventure.
I figured that some of you folks might be interested in self publishing your own content too, so I’m gonna do a little irregular series on the journey documenting all my missteps for educational and entertainment purposes.
Oh hi there, fancy seeing you here…
I’m deep in the guts of my latest project: The Rusted Colossus, a GOZR one-shot adventure. Planning to publish it—probably as a zine, definitely as a PDF.
I figured that some of you folks might be interested in self publishing your own content too, so I’m gonna do a little irregular series on the journey documenting all my missteps for educational and entertainment purposes.
Also, if you have experience of this, please get in touch if you have any advice!
Concept
I knew upfront that I wanted to do a one shot, and design it with GOZR in mind. I really like GOZR, but I do think it’s popularity suffers from a lack of published adventures which is something I can help with, and in terms of project size — doing a one shot seems much more achievable than trying to design an Event Based Campaign or a Sandbox (Besides, GOZR itself has a pretty good sandbox generation kit in it’s own rules that’s ready to go).
Armed with this knowledge, I brainstormed a few quick ideas brazenly inspired by a lifetime of consumed nerd culture and came up with 5 basic concepts:
The Shattered Gozspire – A broken tower of ancient Gozr technology pulses with unstable energy.
Flesh Carnival of the Ooze King – A living fairground of writhing meat and grotesque amusements.
The Wyrm That Burrows the Sky – A sky-eating mega-worm carves a tunnel through reality.
The Rusted Colossus – A giant, dead machine-being lies half-buried in the wastes.
The Halls of the Forgotten Gozr – A tomb-city of long-lost Gozr elders, now ghostly echoes.
Of these, the Rusted Colossus spoke to me the most, I love me a big robot, I do. I could picture this giant mech from the before times being uncovered by the shifting sands of the Ghost Dunes, with the pilot still alive but twisted inside. Why is the Mech there? Who is the pilot? What does he want? Juicy.
Structure
A dungeon is the perfect setting for a one-shot. But in TTRPG terms, a "dungeon" doesn’t have to be stone walls and torch-lit corridors. It’s just a closed adventure space that says, “This is where the action happens”.
But what type of dungeon? Well, it’s a one shot, so I don’t want anything large, or complicated that would hinder the completion of the adventure in one session. That rules out a Megadungeon then!
I decided to do a bit of research and ended up reminding myself of the Five Room Dungeon by roleplayingtips as well discovering the Dungeon Checklist by Goblin Punch. Both of which have helped me to think about how the dungeon breaks down into creamy chunks. I’ll start covering the specifics of those in a later post, but for now, the overview:
Five Room Dungeon
The 5RD says that your one shot dungeon should contain five rooms (o, rly?!) and should follow the narrative story structure of the hero’s journey, with each room representing a step on that path:
A Guardian - The reason no one already cleared this dungeon out. Often a combat, but not neccesarily.
A Puzzle
A Setback - Usually a trick or a trap that forces a strategic adjustment
The climax - Typically your BBEG, but not necessarily a combat.
A Reward, or Plot Twist
You don’t have to approach these in this set order, and you don’t have to approach these as a linear path either. Nor do you have to treat these 5 rooms as literally 5 rooms, rather as five zones? Does that make sense?
Dungeon Checklist
Goblin Punch’s checklist here is pretty detailed, so I’d encourage you to check it out yourself for deep details. Here it is, cross examined against the 5RD framework:
Something to steal - This straddles the idea of “a reward” from the 5rd.
Something to be killed - The “guardian” from 5RD, and any other baddies would seem to fit this.
Something to kill you - A difficult combat encounter or trap, I think this is covered by the BBEG in “the climax” and potentially the “plot twist”.
Different paths - Interesting one for a 5RD, the idea is that the players experience the full five zones, so I’ll need to consider how to make the path the PCs take have actual consequences.
Someone to talk to - I think this could be covered twice, with the “guardian” and “the climax” with the BBEG, with both allowing combat to be avoided.
Something to experiment with - This would work with the “puzzle” room.
Something the players probably won’t find - This exists outside the 5RD structure I think, but I do quite like the idea of tucking a hidden secret in there that only the most cunning players will find for some extra reward.
The Front Cover
Wow, that was some hard thinking. Who’s up for some pretty pictures?
My vision for the front cover is to provide support to the adventure hook, so an illustration from the POV of the PCs with the Colossus looming over them from the distance, half covered by the Ghost Dunes. I love JV West’s evocative verse at the start of GOZR too, and I had to do something similar, handwritten and raw.
One problem though: I’m not a particularly gifted artist, but it’s not for a lack of enthusiasm or enjoyment :) My process here was to sketch out some stuff in pencil drawing from references, like carefully posed toy robots, and Battletech and Gundam art for details. Unfortunately my neuro-spicey super powers do not extend to being able to see and hold mentally generated images in my minds eye with sustainable clarity, which definitely puts a crimp on my artistic aspirations!
Anyway, where was I? Oh yeah, make sketches from references for the individual elements on different pieces of paper, pen over them with black POSCAs, then scan them into my PC. From there, pull them into a super old version of photoshop as individual layers, adjust the thresholds to restrict the image to pure black and white, delete the white and add the colour. Things like the hand-written text can be coloured, stroked, drop shadowed, resized, and repositioned too which is super helpful.
These are my penned over sketches:


And here’s a low res couple of photos of my monitor showing how the front cover is looking right now. I’m trying to decide if the Gooz in the foreground should have red or white highlights. I’m leaning towards red, what do you think?

The other thing I did was reach out to JV West and ask him about his 3rd party license for GOZR, which he’s kindly directed me towards. Following the terms of the license lets me put that cool little badge in the bottom corner of the work, and lends the work a degree of credibility.
Also, I think it’s polite right? To let the original creator know what you’re doing and get their blessing?
Conclusion
Phew, long one this. Sorry about that, I normally like to keep it concise. Anyway, I hope you enjoyed this, you’d be doing me a massive favour if you could share this post on your socials - see if we can build up a bit of hype, and keep me motivated to continue through engagement!
I’ll be posting another one of these as and when I’ve got something to report, so the posting schedule will exist outside the usual weekly cadence of posts.
Hey, thanks for reading - you’re good people. If you’ve enjoyed reading this and want to make sure that you don’t miss any future updates, maybe think about subscribing to the Mailer of Many Things! Either way, catch you later.


GOZR: The Wacky, Wild, Weird, and W’excellent TTRPG You’ve Been Sleeping On
Angry sky bleeds upon a fallen world.
Sky Wyrms hunt meat.
Fallen towers radiate fading spells.
Pretty ones rot in the dirt. Lost.
The Gooz rise.
Angry sky bleeds upon a fallen world.
Sky Wyrms hunt meat.
Fallen towers radiate fading spells.
Pretty ones rot in the dirt. Lost.
The Gooz rise.
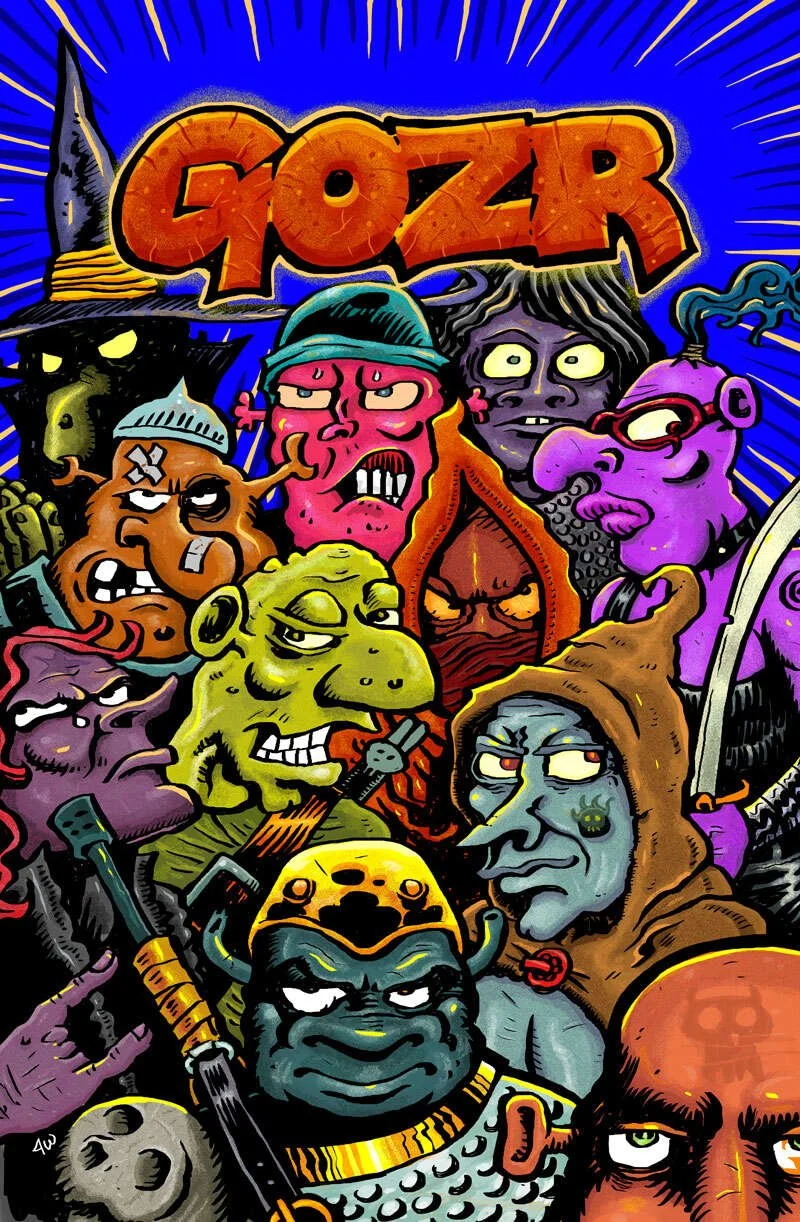
S’up dawgs. Today’s post is about GOZR. If you follow me on Bluesky, you’ve probably seen me post about it a few times already, including some of my fan art. If you love the OSR, gonzo post-apocalyptic settings, or still have that subscription to Heavy Metal magazine, you’ll love GOZR.
GOZR (presumably a portmanteau of Gooz & OSR) was released in 2022 after a successful Kickstarter, so you might be forgiven for asking why the hell I’m dredging it up now in 2025? Well, because it’s my blog and I like GOZR, and I feel like it’s massively been ignored by the world and that’s a damned shame. If little old me can make a smidgen of a difference and highlight the worthwhile work of an artist, and maybe persuade a couple of you good folks to part with a few pennies of your hard earned pocket money, then all’s the better I say.
I ain’t getting paid or any cutback for this though, I should add. This is all genuine affection on my part, and not financially motivated.
What in the name of sweet baby medusa is GOZR?
It’s a bold, handwritten (as in, no fonts) TTRPG by JV West, of Black Pudding infamy, set in a totally wacky post apocalyptic world. Tongues are firmly in cheeks with this setting and it’s inhabitants, which makes for a nice lighthearted game at the table. As of right now, there’s only the rulebook, and a fill-in-the-blanks one page adventure that have been released officially, the rulebook is both available as a physical book and as a PDF, and the adventure is a free download from JV’s website.
The general style of the game is OSR (which means rules-lite, fast, creative, and clever play), which is nice because it frees up player imagination and means that the GM doesn’t have to carry a small library’s worth of books around with them. Some people might prefer a much chonkier game that has explicit bespoke mechanics designed for various scenarios that barely arise, and a number of video-game like character abilities baked into a class system, but GOZR ain’t that, and that’s A-OK with me.
More than anything though, GOZR is a work of art, dude. It’s heavy on vibes, heavy on inspirational GM content (like tables), and very very heavy on illustrations.

Like seriously, if I had to guess, I’d say it was weighted at about 70% tables & improvisation cues, 20% art, and 10% rules!
You goad me wizard, I would have you speak of the setting, plain and true!
Much of the official cannon of the setting is left to the GMs imagination, but piecing together the snippets of text and other clues, this is what I like to think:

In the near future, humanity manages to create an extinction event for itself via screwing around directly with the Sun. This triggers erratic behavior in Sol, unleashing freakish meteorological events that scar the world.
Years later, in the wake of Humanity’s passing, a new humanoid species comes to dominate the planet. The Gooz: at first glance, an unworthy race—slightly diminutive, superstitious, Sol-worshipping, ingenious yet adventurous. They have the cunning of goblins and the foolhardy curiosity of a feline. Yet somehow, the Gooz have built a flourishing civilization. Many brave souls tread beyond the boundaries of GOZR City, seeking treasure, answers, or both among the ruins of strange 'magical' towers left behind by 'the pretty ones'.
This world is a dangerous place, not least because of the ever changing whims of Sol, but all the Robots, Sky Wyrms, M’rons, Ickmucks and more have spread unchecked, and would make a tasty treat of a hapless Gooz.
Does it play as well as Slash on a skateboard, casually rolling down the road outside a bar & grill?

The game engine is based on a familiar d20 roll over AC system, but unlike D&D, there are only 3 stats and all rolls are player facing. This is nice because the players get to roll more, and everyone loves rolling bones!
Additionally, the core engine also has a system built into it which codifies degrees of success, and failing forwards. This means that flat “no” is a rare occurrence, and instead we’re much more likely to see “No, but…”, “Yes, but…”, and “Yes and…” which are integral components of modern improvisation techniques, and more games would benefit from the same emphasis.

Gameplay is simultaneously very deadly and very forgiving. Damage dice explode and HP is low, but this is actually my favourite rule: When a Gooz “dies” (at zero HP) the player can make a choice between “Death or Debasement”. The latter means your Gooz survives, but at a cost to their stats or abilities. The former means that your Gooz did indeed die, but you get a bonus to the stats of your next Gooz!
Plus, rolling up a Gooz is such a joy, following JV’s step by step guide you end up creating this wonderfully weird little Jim Henson meets Heavy Metal crossover!
A flawed gem
It’s only fair for me to point out the two flaws I see with GOZR (albeit ones with solutions) - it’s not all love and sunshine. Firstly, while it’s a joy to behold as a work of art, the book isn’t the easiest to use as a rules reference. There’s just so much going on all over the place that you could spend a long time simply enjoying a single page without finding the rule you were looking for.
Luckily, your old buddy Jimmi has you covered, I’ve created a free comprehensive cheat sheet for you to print out at home. I’m too good to you all, I really am.

The other niggle I have with the game is that it lacks examples of play, or an included introductory adventure.
This is a shame in my view, as such things can be really valuable as tools to manage a GMs expectations and set them up running straight away. JV did write an adventure which is published on his website, but for me, it leans too strongly on the idea that GM’s can make adventures their own, and I’d have preferred it, as a starter adventure, to have had more specifics to save me some brain juice. For example, a more structured adventure might include a specific room layout, or pre-written NPCs.
This is not a show stopper by any means though, as there are many adventures out there on the internet that can be adapted quite easily to suit the game or you might even enjoy making up your own using the game’s innumerable world generation tables.
Conclusion
Go buy GOZR right now.
It ticks all the boxes - It’s made with indie love, packed with art, not expensive, easy to learn, fun to play, and a joy to read. Honestly I’d love to see more people playing this game, giving it the love it deserves.
Hey, thanks for reading - you’re good people. If you’ve enjoyed reading this, it’d be great if you could share it on your socials, and maybe think about subscribing to the Mailer of Many Things! Either way, catch you later.